Showing posts with label diy wall art. Show all posts

Saturday, April 11, 2015

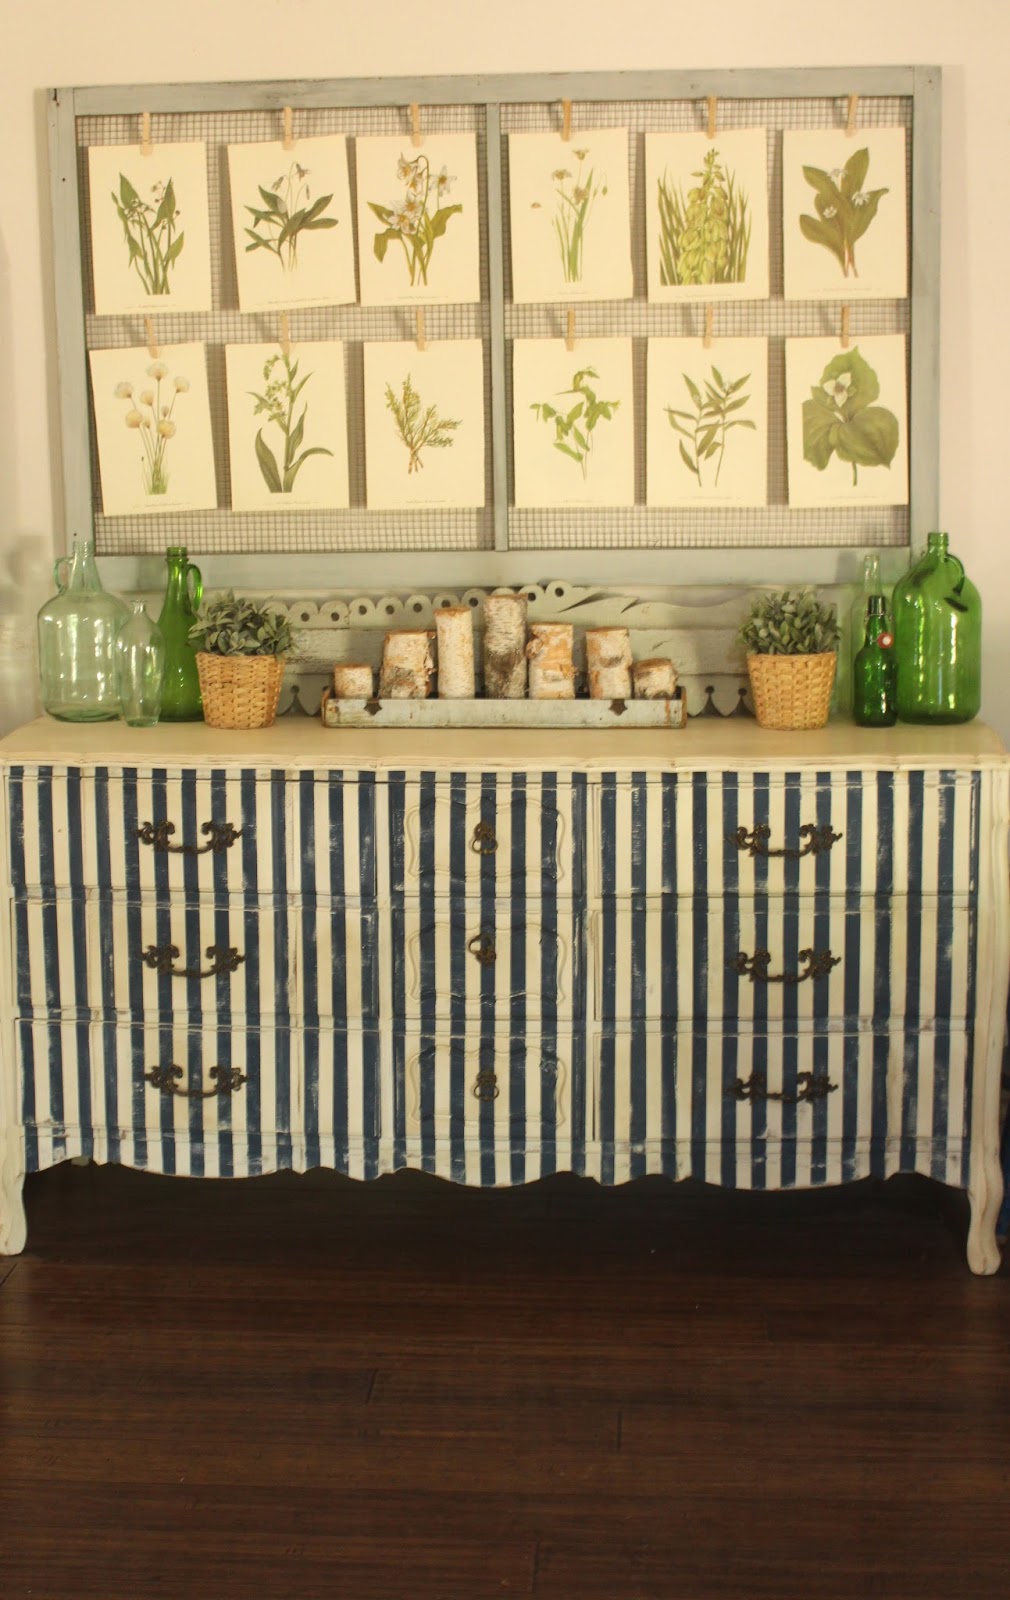
Raining Day Dresser

I'M BACK! It's been FOREVER since I lasted posted on here! I've missed sharing my life with and my projects with you but taking a break from the blog has given me some new perspective and helped me to reprioritize a few things in my life! It has also reinvigorated my passion for decorating my home and painting furniture, and just being creative for the sake of it instead of feeling pressured to!
God has been teaching me so much through this time too! It has not been an easy few months in my world but He has been teaching me truly what it means to trust in Him and to have hope even when your circumstances do not seem very hopeful! He is teaching me that sometimes you have to go through a storm to see the rainbow at the end! Which brings me to a little project I've been working on...


Here's a "before" picture of the dresser. As you can see it was painted brown by its previous owner and some of the brown was chipping off.

I call it my "raining day dresser", I call it that because I started painting in way back in December on a raining day and then I finished it a few days ago on another raining day. That might not seem very significant to you but here on the central coast of California, we haven't been getting very many raining days!


As I was finishing the dresser the other day I began to think about how the rain and storms signify troubling times in our life but it was because of the rain I was able to spend time creating something I find beautiful! God does this too in our lives if we let Him. He will use the storms and hard times to create something beautiful in us!
This is the promise God has for us when we go through suffering, Romans 5:3-4 we[c] also glory in our sufferings, because we know that suffering produces perseverance; 4 perseverance, character; and character, hope.


Here's a quick overview of how I painted my "raining day dresser". I started by painting the entire dresser Old White Annie Sloan Chalk Paint. It took several coats to get good coverage, as is usually the case when painting a piece white.


Next I used painter's tape to tape off vertical lines on the front of the dresser and next I carefully painting the stripes a navy blue color (it was some left over latex paint I had from when I painted my laundry room). Next I sanded the stripes, first with my electric hand sander and next by hand, to give it a worn look. I also sanded and distressed around all the edges of the dresser.


I waxed it first with Annie Sloan Clear Wax and then I used Annie Sloan Dark Wax (mixed with some paint thinner to give it a thinner consistency). Finally I buffed the piece with a soft cloth.I'm excited to be sharing with you again here on the blog! Soon I will be showing how I put together this fun wall art that's hanging above my dresser, so stay tuned for more!


Linked up to:http://missmustardseed.com/, http://elizabethandco.blogspot.com/http://www.stonegableblog.com, http://cityfarmhouse.com/, http://www.thegoldensycamore.com,http://www.findingsilverpennies.com/, http://www.homestoriesatoz.com/,  http://www.craftberrybush.com/


Friday, August 22, 2014

How I Faked a Plank Wall and DIY Wall Art!

If you've seen any of my furniture makeover posts you've likely seen this wall in my entry way...
I live in a 1300 square foot house, in which open wall space is limited! So this little 6ft long wall as become my "staging" spot for most of my furniture makeovers!

I love my chalkboards, but I didn't want to feel limited to using them all the time in my staging shots. So I took them down and the more I looked at my beige/brownish wall all bare, I knew I was going to be doing some painting!

I decided to go with white! I don't have any walls in my home that are white! And I felt it would really lightened things up in this little corner/ entryway. So I painted the wall white...

I've been drooling over plank walls for while now.

But since we are currently looking for a new home I didn't want to do the work (or spend the money) on the real deal plank walls.

So I started to brainstorm how I could get the look of plank walls without too much work or commitment. I found this post about using molding strips for stripes on a wall. And I decided this would be the route I would go for my wall.

So here's my wall now!

What do you think?!


I painted my wall white and then repainted a bit warmer off white color. It looks almost cream or yellow in the pictures though which is not what I was going for. I may be repainted again soon! Then I nailed on strips of wood I found in the molding and trim section in Home Depot (the trim was called "screen molding"). Next I used spackle to fill the nail holes and I painted the wood strips the same color as my wall.

I'm still not 100% sure about the wall, I think I'm going to have to live with it for awhile, but for now I'm enjoying the change.
I'm loving the new wall art that I made though! I was inspired by a old number sign I found last year at an antique fair. I've always regretted not buying it so it made my own (well actually I made three of my own!) I believe my inspirational sign was actually used at an old baseball stadium in scoreboard. My signs mark the date of my wedding anniversary April 21st.
Want to find out how I made these DIY wall art?! Stay tuned I'll be posting a tutorial soon! Don't forget to subscribe to The Painted Willows so you don't miss a post! Have a lovely day!