Thursday, July 24, 2014

Sweet Vintage Book Holder

It's been a busy week, we have family in town, and my kiddos are loving playing with their cousins! So I thought I would share a piece a did awhile ago (before I started the blog)...


I just love the curves on this piece and the spindles they are just so sweet!


A friend of mine scored this vintage book holder for free! It had some mid-century modern style legs oringally. But it just didn't seem like they belonged so I took them off. I painted this piece an aqua color and I used a homemade chalk paint recipe (latex paint + Plaster of Paris). I'm not sure of the measurements of paint to Plaster of Paris since I whipped up the recipe a long while ago and because I usually don't measure precisely anyways ;)

There are a ton of recipes online for homemade chalk paint in case you interested in making your own! Here's one i found here http://retroranchrenovation.blogspot.com/2013/09/homemade-chalk-paint-bandwagon-painting.html


I decided to share this piece with you since its headed back to my friend's house (the one who originally found it). She was kind enough to let me use it in my daughter's room and I'm on a purging spree at the moment (I'm downsizing like crazy). I love to do that every couple months! It feels so good to get rid of stuff that is just cluttering our house!


It feels like a fresh start and in a 1300 square foot house with 2 kiddos, 2 adults, and 3 dogs, we don't need the added clutter of things that don't function well in our home. I made a decision a while ago that if I don't absolutely love something or if something is really not helpful or functional in my home, it's much better for me to let it go! Sometimes less is more!

Do you enjoy decluttering as much as I do?!

Thanks for stopping by hope your having a lovely day!

Linked up to:http://missmustardseed.com/http://tatertotsandjello.com/http://elizabethandco.blogspot.com/http://www.lizmarieblog.com http://www.stonegableblog.comhttp://cityfarmhouse.com/http://www.thegoldensycamore.comhttp://www.joyinourhome.com

Monday, July 21, 2014

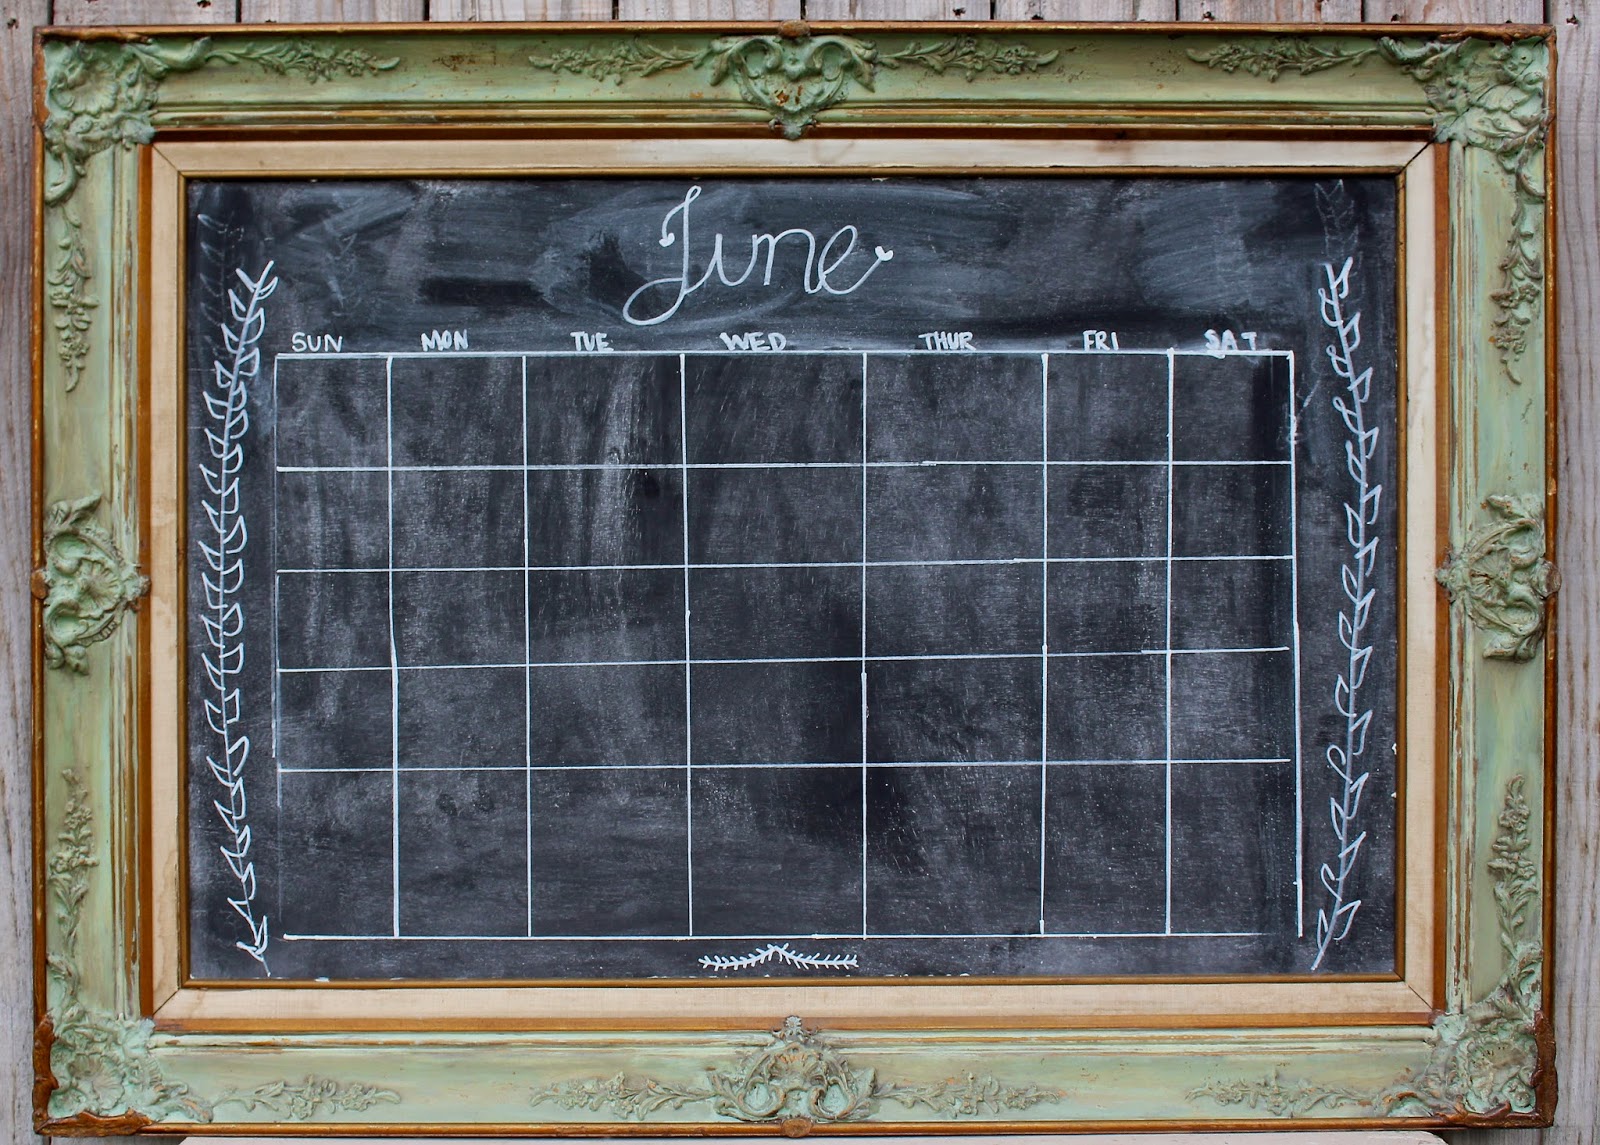
Chippy Chalkboard Calendar

I've been itching lately to do a project for our home! I love doing pieces for other people but there's just something so freeing about doing something for myself! I can experiment and be creative in a way that I can't when I'm doing work for clients! This little project was like therapy to me!


A calendar is something we desperately needed in our home! Can you believe we didn't have one! As my kiddos are growing life is becoming more and more busy. Most "normal" people just go buy a calendar at the store but I just couldn't find anything I liked. I knew I wanted to make one and when I found a large ornate frame recently on this shopping adventure, I started to envision using it to make my calendar.

I'm sorry I don't have any before pictures of the frame! I'm terrible about that! I just get too excited to dive in to a project and I forget to take pictures. But just picture a large ornante gold frame that was falling apart.

My hubby helped me glue and clamp it down in several spots to secure the frame and then I glued my chalkboard on. I made the chalkboard using plywood from Home Depot that I spray painted with chalkboard paint.

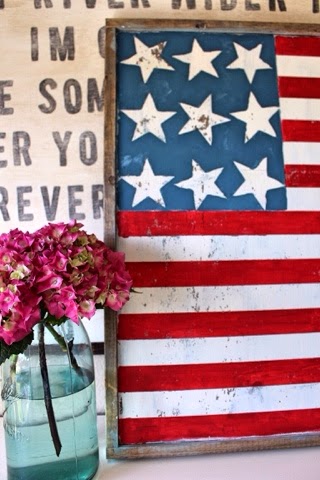
Next came the fun part! I painted the frame using Miss Mustard Seed Milk Paint. I used a similar mixture of colors that Miss Mustard Seed used recently to create a mint tone, she called her mixture Layla's Mint. I had Eulalie's Sky and Lucketts Green on hand but instead of using Ironstone I used Linen to lightened the color a bit. This was only my second time using Milk Paint, I used it to make this sign...


I'm getting practice with these smaller pieces before I tackle something bigger! I'm in love with the Milk Paint so far though check out this awesome chippyness...


And crackle affect...


The variation in color happened on accident. I painted my frame and left a small amount of my paint out for a few hours and when I came back I decided to add a bit more paint on a few areas of the frame that I originally didn't paint. The paint was clumpy and thick since I left it out but I just added a little bit of water and went for it. This created the variation of color that you see on the frame. And although I didn't plan on this to happen, I love it!


Now I just need to start using my calendar! If you haven't liked my Facebook page you should! I'm getting close to 150 likes and then I will be doing a giveaway! Thanks for stopping by and have a lovely day!

Linking up to: http://www.missmustardseedsmilkpaint.com/blog/ http://tatertotsandjello.com/http://elizabethandco.blogspot.com/http://www.lizmarieblog.com http://www.stonegableblog.comhttp://cityfarmhouse.com/http://www.thegoldensycamore.comhttp://www.joyinourhome.com, http://www.findingsilverpennies.com/

Thursday, July 17, 2014

Grey French Provincial Dresser

I just finished the dresser that is part of a set with these night stands…


Here it is in my garage! It's one heavy piece of furniture! In the past I would just drag it in my house to take pictures, but since we recently installed new flooring I decided it would have to stay in my lovely garage :)


I describe the process I used on this dresser in this post. Here a few shots with my little helpers!


They were having fun balancing things on their heads! And here are a few more shots of the dresser…


That's it for now! I'm excited to share with you something I've been working on for my own home! Like me on Facebook or find me on bloglovin so you don't miss a post! And thanks for stopping by!

Linked up to:http://missmustardseed.com/http://tatertotsandjello.com/http://elizabethandco.blogspot.com/http://www.lizmarieblog.com http://www.stonegableblog.comhttp://cityfarmhouse.com/http://www.thegoldensycamore.comhttp://www.joyinourhome.com

Thursday, July 10, 2014

How I get crisp lines when painting two-toned furniture

Have you noticed I've been doing a lot of two-toned french provincial style makeovers lately! I'm just love the look. Can you tell?!


I figured I would show you how I get nice crisp lines, it took a lot of trial and error but I figured out a system that works well for me!

I start by painting the piece in the color that will end up being in the groves and recessed areas. For example I painted this piece all white first. Sorry I don't have any photos throughout my process but it is pretty simple and if you have any questions please ask me in the comment section below!


I often use a white primer in this step to kill two birds with one stone, my piece is primed and ready for paint and the groves and recessed areas have their first coat of white.

Next I go ahead and paint my first coat of the main color of the piece. In this case, that means I do the first coat of gray. I roll on the paint in the large areas that are not close to my edges and then I cut in carefully near my spaces that will stay white.


I do a second coat of the main color the same way I did the first coat.

And then the fun part, well more like the tedious part :) now I go in and do several coats with my paint pen on the groves and recessed areas. The paint pen makes it really easy to get a nice straight line. But I do usually need several coats to get good coverage. Here is the paint pen I used in all of the makeovers above. I got it at Walmart in the craft section.


I also have to paint in some of the areas that the paint pen is too wide to fit in.  I used Annie Sloan Chalk Paint the color Old White in all of the makeovers above, it is close to the color of the paint pen, although it does have more yellow in it, but I usually end up using antiquing wax over my pieces and you can't tell the slight variation in color.

I'm off to finish a dresser that matches the grey end tables from this post. I will be working hard painting with my painter's pen and watching Frozen with my kiddos! Life is pretty sweet :) Hope you are having a lovely day!


  Linked up to:http://missmustardseed.com/http://tatertotsandjello.com/http://elizabethandco.blogspot.com/http://www.lizmarieblog.com http://www.stonegableblog.comhttp://cityfarmhouse.com/http://www.thegoldensycamore.comhttp://www.joyinourhome.com

Thursday, July 3, 2014

A Sweet Gift (and an end table)

My best friend Noelle and I, both have a love for treasure hunting, so when she invited me to go with her to the Venture flea market last week I jumped on board! Here I am with our kiddos, we have 4 between the two of us! It was quite the adventure to say the least!


Her mom met us there since she lives close by. She helped wrangle the kids and did a little treasure hunting as well!

During our trip I spotted something that I always hunt for, an ironstone plate! Ironstone is a rare find where we live, unless you want to pay a small fortune for it! I've been collecting ironstone plates in the hopes that one day I will have sweet little set of mismatched ironstone plates. I spent $1 on the plate! I was beyond excited! And then tragedy struck (well not really tragedy but close) I dropped my beloved plate! I was so sad!

We went on with our day and had a great time but I couldn't get that plate out of my head! Two days later at a garage sale I found the same plate for a quarter! I had a grip on that plate like it was my first born child! I've decided it was gift from God that sweet little plate, just a reminder of how much he cares for us, even the silly little things we care about matter to Him.

After finding that plate I was motivated to get some work done on end tables that I've been painting for Noelle's mom. Since I had just seen her we made some decisions on exactly how she wanted them finished and here they are...


I love how the end tables turned out! I'm a sucker for two toned french provincial style furniture!

Tuesday, July 1, 2014

Burlap Banner Tutorial

I mentioned last week that I'm I've been inspired to make changes to my blog/business. I really have no idea what I'm doing when it comes to blogging! I'm just learning as I go. This is all new to me and I would love any input you have on what you would like to see on my blog and what I should sell in my shop (I do have a few ideas though ;) and I'm so excited to implement them when the time comes!

I'm excited to start a craft portion of my blog to share fun craft ideas and today I'm sharing a burlap banner that I made for a friends bridal shower and wedding! This is the version for the shower. It says "SOON TO BE MR. & MRS"…


And all you have to do is take a few of the banners off and its perfect for wedding decor and even to decorate a master bedroom long after the wedding!


I made these banners easy to take on and off so they would be versatile! I got the idea to make them like this through this tutorial. Here's a quick overview of how I made them:

1. I cut Heat N Bond (the no-sew kind) into 12 X 12 inch squares. You can find Heat N Bond at Walmart.
2. I made the shape for my pennant flag using my Silhouette Cameo software and ran the squares of Heat N Bond through the machine so they were cute in the flag shape you see above in my pictures.
3. Next I ironed my the pennant flag, the one I just cut on my Cameo, on to burlap and cut the burlap to fit the pennant shape. You can get burlap from Walmart for $3 a yard!
4. In order to make it a bit more secure I next ironed my burlap on to white muslim, also found at Walmart, which acts as a backing.
5. To make them easy to take on and off I ironed a crease at the top of my burlap flag.
6. And lastly I stenciled the letters on!
I decided it would be fun to stage my banner in my back yard, as if it were really hanging as decor at a wedding! I imagined my backyard "wedding" would be a sweet vintage inspired garden wedding. I pulled out my favorite console table and hung my banner on it. I used an antique wire basket to hold vintage sheets which I thought my "guests" could use to picnic on. And I pulled out an old chippy box I had to hold antique jars filled with flowers from my garden. My husband  was looking at me like I was crazy as I hauled things into my back yard. But that's what us girls have to do sometimes, use our imaginations and just create!

Here are the pictures from the "wedding" :)


I have another furniture makeover for you I will be sharing it shortly! I hope you are finding time to be creative today too!

Blue Ombré Dresser and Patriotic Decorations

I'm so excited to share this fun dresser with you today!


The best part about this makeover was working with my friend's daughter, Abbie. My good friend approached me about teaching her daughter how to paint furniture and I was beyond excited! And can I just say, Abbie is amazing! She caught on so quickly and worked diligently on her dresser! I loved watching her learn, feel pride in her work, and satisfied with the outcome. It was such a reward for me! I think she might have caught a little bit of the painting bug too :)

Here it is before we started...


Here it is all dolled up with a patriotic sign I made on Memorial Day and some bunting flags I made for my brother and sister-in-law's baby shower. I felt like this was a fun way to stage this piece since we just had Memorial Day and the 4th of July is right around the corner! But I honestly love Americana Decor for any time of the year...


Here's a close up of my flag sign. I used this sign to experiment a bit with Miss Mustard Seed's Milk Paint, since I've never used it before. I love am in love with the chippyness and crackling that happened with I used the Milk Paint! I used the Eulalie's Sky color followed by Linen and then painted the red and blue with latex paint I had in my stash...